
Stereo audio is like a baked cake. It is not possible to remove the sugar or the flour, nor is it possible to remove specific sounds, tones or instruments once they appear on a recording.
Recorded MIDI on the other hand, is like having access to the cake recipe during development of the composition. It allows you to tweak this, remove that and modify everything about the ingredients – tasting it as you go.
MIDI is effectively a multi-note and multi-channel recording for musicians and composers.
In this Topic I shall be looking at what you can do with the MIDI Recorder.
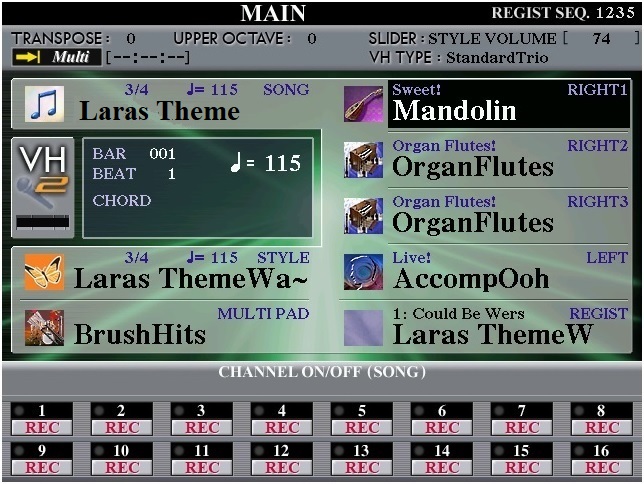
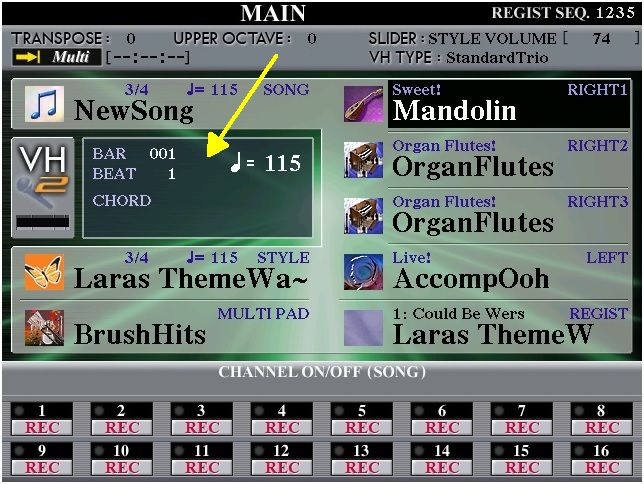
Yamaha call the MIDI Recorder the SONG Recorder and when you have recorded your MIDI SONG, you put it into the top left slot 'A' in the MAIN screen.
- The MIDI (SONG) Recorder.

Multitrack Recording on Yamaha Keyboards
The initial layout.
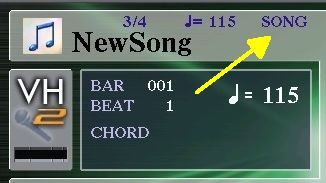
When you switch on the keyboard the ‘A’ button on the top left of the screen (the SONG slot) shows New Song. This is the default.
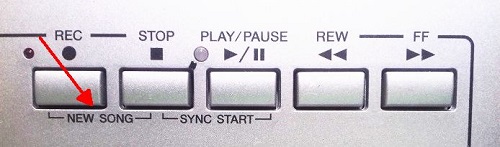
If you have recorded or played another song (Yamaha call MIDIs Songs) it will show up in this slot. So, to start with a clean slate, set that to New Song by pressing the TWO buttons on the LEFT side (REC and STOP) together.
Now you are almost set to go.
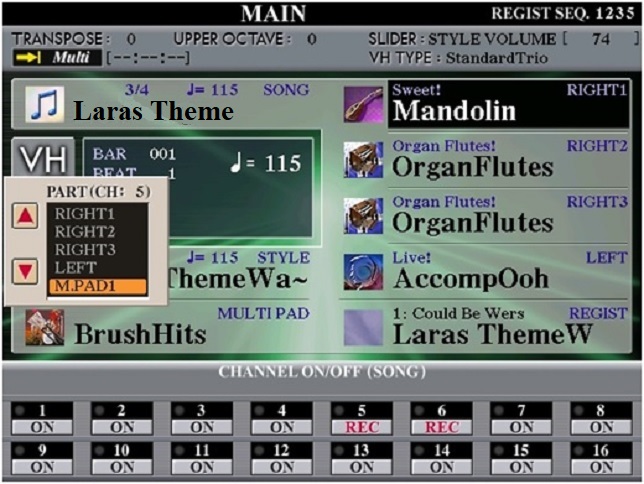
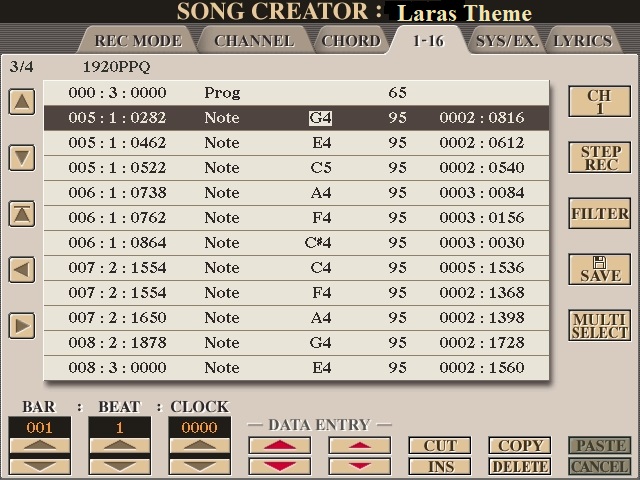
Midi records to 16 channels.
Channel 1, 3 and 4 are for your R1, R2 and R3.
Channel 2 is reserved for the left voice.
Channel 9 to 16 are the Style voices.
This is the basic initial setup for your melody and style for the Midi.
As you go through each of the steps below ... DON”T FORGET TO SAVE!!!!!
Setting the Registrations.
Now set your registrations to the voices and styles that you want to record, remembering that ALL the R1, R2 and R3 will play the melody notes so be selective. Example, set R1 as Piano and R2 as Strings. That will be enough for that. Set the Left Voice as eg. a Choir for going onto Channel 2. That will give a choir accompaniment with the style. The voice will be the chords that you play.
Put that setting into REGISTRATION MEMORY button 1. Change the voices for REGISTRATION MEMORY button 2. Example, Vibraphone on R1 and Soft Sax on R2 and maybe Choir Ooh on R3; and so on with other registration buttons.
Now go to the Mixing Console and separate the voices for your stereo effect and volume balance and octave balance, remembering to register these to the registration buttons.
Now you are set to make your SONG.
- ♫♫♫♫
Getting your recording going.
Having pressed the Record and Stop buttons together you now press the REC button. A red light will flash (which, in essence, tells you to stop or you will get into frustrations!). Ignore this and look at your MAIN screen. There will be TWO rows of icons showing you the channels to be recorded (at the bottom of the screen). If you have got this far you are great!
The main screen will show BAR 001; BEAT 1. This will stay there until you start your playing. It will then show you the location that you are at, eg. BAR 24; BEAT 2. As they say in AFL “Play On” to the end of your song, changing your registration buttons as you want.
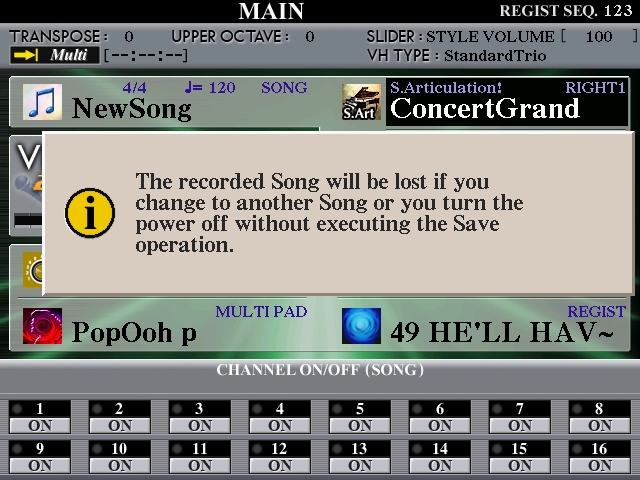
Now for the fun part that Yamaha forgot! Press the STOP button on the MIDI recorder (one of the buttons you pressed before) and you will get a BIG grey box telling you that the Song will be lost if you don’t save it. Yamaha forgot to tell you how to do this!!!
I will tell you now.
Press the “A” button, top left of the main screen, the one you pressed to get “New Song” and the main screen will now show the PRESET tab. Yamaha love pushing their bits so just tab across to the USER tab. Then you will see on the bottom of your screen a SAVE button. Highlight this (hope you know how to do this) and the box will come across the bottom of the screen for you to name your song. Lower 6 will save your song.
If you have got this far then you are a star!

DON”T FORGET TO SAVE!!!!!
 ..
..