Using STYLE CREATOR to 'adjust' a STYLE

Image

Using STYLE CREATOR to 'adjust' a STYLE

Postby Hugh-AR » 21 Feb 2021 17:27

Using STYLE CREATOR

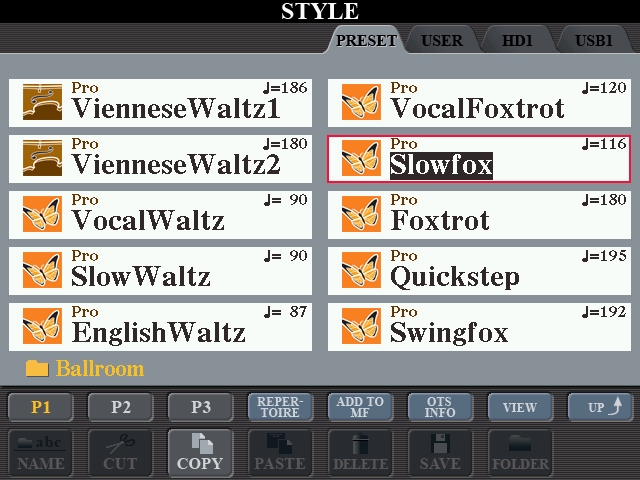
There are several videos on YouTube showing you how to "create a STYLE from scratch". They lay down the drum track, add a bass line, and so on. Now unless you are a composer, I can't see anybody wanting to do that. There are so many STYLES available for you to use to play something you can choose one of those to play what you want to play.

But does the STYLE have everything in it that you want to hear? If not, then with Yamaha keyboards you can get at the various PARTS that make up a STYLE and 'tweak' them to your liking. It doesn't matter whether you have a PSR Keyboard, a Tyros 2, Tyros 4, Tyros 5 or a Genos .. or even an older Yamaha organ with 'built in' STYLES like the AR80 (which I have). They are all Yamaha products, and the principles I shall be outlining are the same for them all. You just press different buttons (or the screen) to get there.

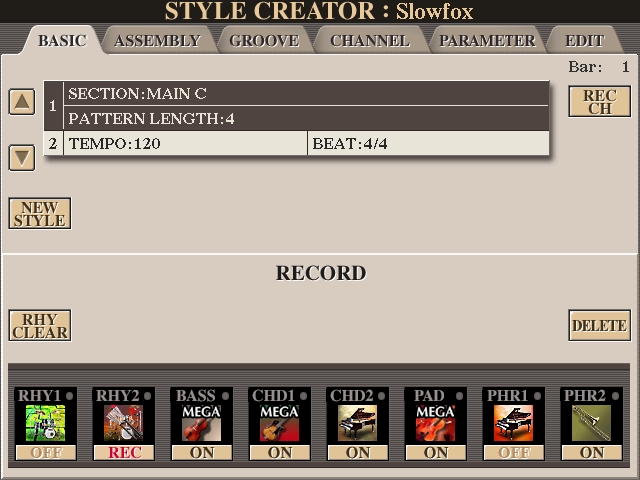
First, let's take a look at how a STYLE is made up. The STYLE is made up of PARTS, which blend together to make the backing you hear.

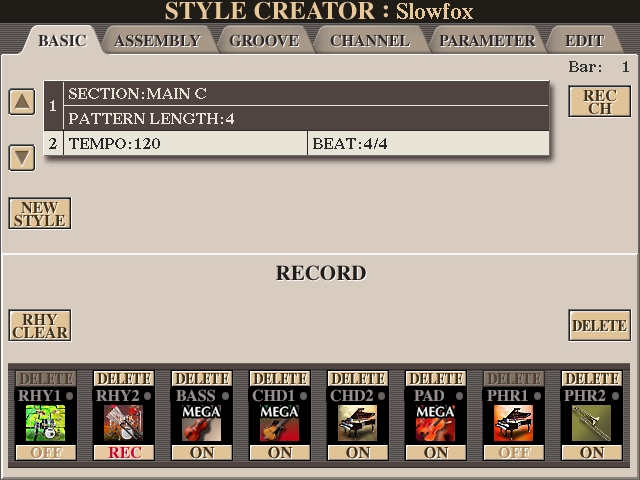
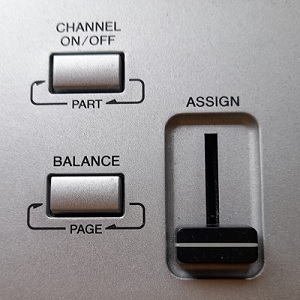
These PARTS are named: RHYTHM 1, RHYTHM 2, BASS, CHORD 1, CHORD 2, PAD, PHRASE 1, PHRASE 2, and you can get at any of these PARTS and change them. For starters, you can turn individual PARTS "ON" or "OFF" so you can hear or not hear them. To do this, press the CHANNEL ON/OFF button.

Image

.. you will see the PARTS listed on the screen, and they will say ON or OFF under each one.

Image

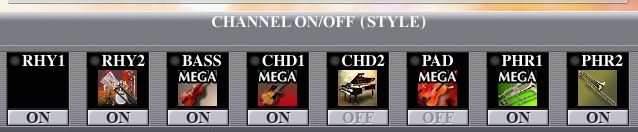
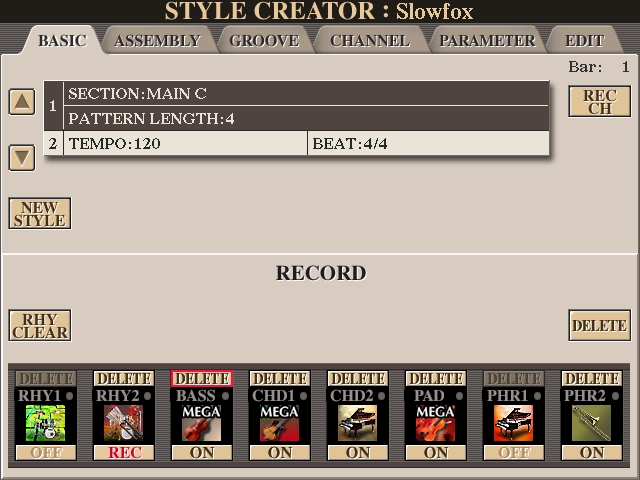
By pressing the bottom data control buttons (arrows) under the screen (numbered 1 to 8 ) ..

Image

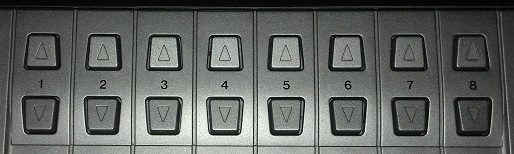
.. you can turn these to OFF. This bottom button is a 'toggle switch' so pressing it again will turn it back ON (and equally, if it was OFF to start with then pressing that bottom button will turn it ON).

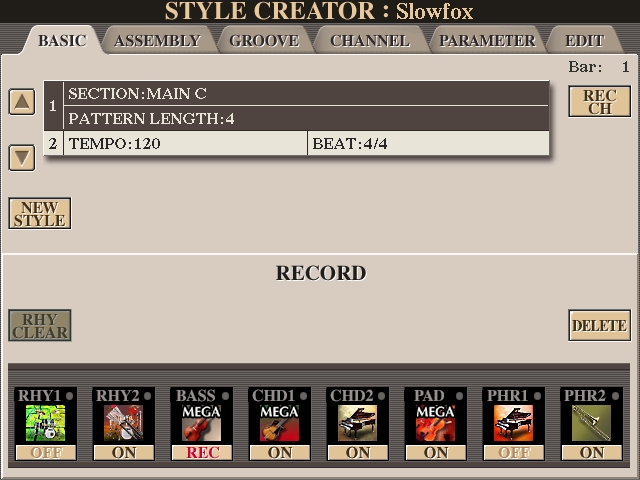
If you turn all the Channel PARTS to OFF and check them out individually by turning them ON, one at a time, you will hear what is in each PART. You need to do this before using STYLE CREATOR in order to have a plan as to what it is you are going to do.

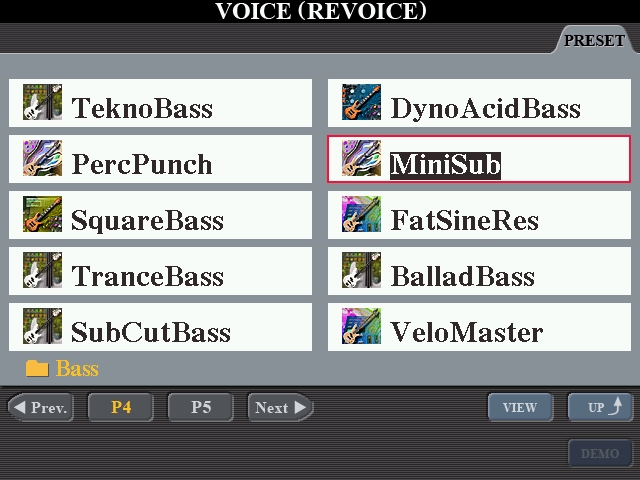
You can also check out what VOICE is being used in each PART by pressing the corresponding TOP button. For example, by pressing the TOP button under BASS you get this:

Image

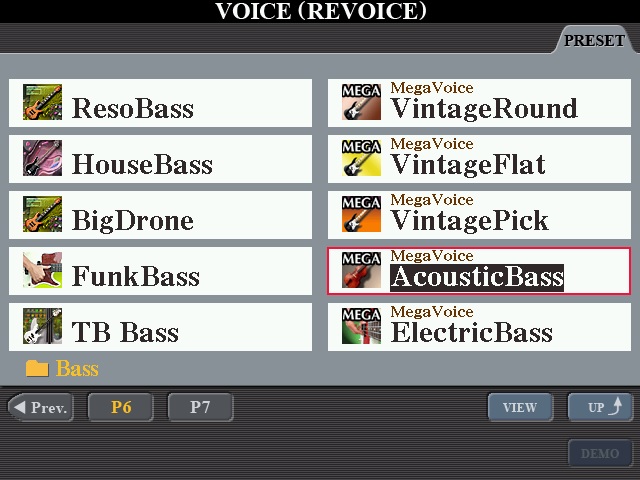
If you wanted to change that to another BASS voice just look for one on any Page in this section and highlight it. When you go back to playing your piece it will have this new VOICE playing the bass 'pattern'.

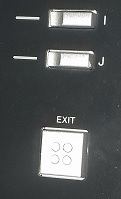
When you have finished with seeing what the VOICE is (or have actually changed it to another one) press the EXIT button to get back to the MAIN screen.

Image

(Note: Any changes you make to your REGISTRATIONS, if you want to keep them you'll have to SAVE them.)
It's all about the music ♫ ♪ ♫ Organ: Yamaha AR80 & Keyboard: Tyros 4
Image .. Image
Challenge Winner
2021 May (Joint Winner); July; September
2022 July; August
2023 April; June; September
User avatar
Hugh-AR
Prolific Poster
 
Posts: 7361
Joined: 07 Feb 2015 15:34
Location: Weston-super-Mare, Somerset, UK

Re: Using STYLE CREATOR to 'adjust' a STYLE

Postby Hugh-AR » 21 Feb 2021 19:04

Let's now listen to a piece and see what additions/changes we could make to what forms the STYLE. The song is called The Story Of My Life, and was sung by Michael Holliday in 1958. What I want to hear in this song is .. a 'whistle' to complement the melody in the Verse; a 'walking bass' for the BASS Part in the Chorus; and also in the Chorus, a 'repeating piano'.

In this DEMO below I have played a VERSE using the STYLE Slow Foxtrot, VARIATION B, followed by the CHORUS using VARIATION C from the same Style. What you hear is the 'default' STYLE 'as is'. This is followed by a VERSE and a CHORUS played as I want to hear it ..with the 'whistle', the 'walking bass' and the 'repeating piano'. The 'whistle' I have done using a MULTI PAD, but as I am concentrating on STYLE CREATOR in this Topic I'll leave that for later. I'll explain as best I can how I managed to change the Style to get the sounds I wanted.

Do a right-click to open this up in a New Tab.
DEMO of Story Of My Life using the Slow Foxtrot STYLE 'as is'; followed by the 'adjusted' STYLE from VARIATION C after using STYLE CREATOR.

To be continued ...
It's all about the music ♫ ♪ ♫ Organ: Yamaha AR80 & Keyboard: Tyros 4
Image .. Image
Challenge Winner
2021 May (Joint Winner); July; September
2022 July; August
2023 April; June; September
User avatar
Hugh-AR
Prolific Poster
 
Posts: 7361
Joined: 07 Feb 2015 15:34
Location: Weston-super-Mare, Somerset, UK

Re: Using STYLE CREATOR to 'adjust' a STYLE

Postby Hugh-AR » 22 Feb 2021 00:02

Using STYLE CREATOR

First, you have to choose the STYLE and VARIATION you want to make changes to so it is ready to go. Changes you make will apply to that VARIATION only .. the other VARIATIONS will remain as they were. For this song I want to make changes to Slow Foxtrot, VARIATION C.

Image

Slowfox is chosen, and obviously I have pressed the button for VARIATION C.

In MENU, press DIGITAL RECORDING.

Image

You will see this:

Image

Choose STYLE CREATOR.

This is what you see:

Image

At this point, check that the STYLE and VARIATION are the one you were expecting to see. In this screen, it says Slowfox at the top; and in the first box it says SECTION:MAIN C .. which is correct.

You will see that the 'default' is to RECORD to RHYTHM2. The PART I want to RECORD to is the BASS PART. When you have a Yamaha original PART in a Channel you can't make changes to it or 'add' into it (you can if it's one you have done) so first we must DELETE what is in there.

Press and HOLD the DELETE button on the right and you will see this:

Image

(An aside: Note that PHRASE1 does not have the word DELETE over it. This means there is no PART in there and there is nothing to DELETE, so PHRASE1 is a good place to put our 'repeating piano' without affecting the mix making up the backing.)

Whilst still HOLDING DOWN that DELETE button, press the TOP arrow of the sliders underneath corresponding to the PART you want to DELETE. You will see the word DELETE has turned RED.

Image

Release both buttons.

We now have to set up the PART (Channel) we want to RECORD into. Another 'Press and HOLD' coming up!

PRESS and HOLD the REC CH (RECORD CHANNEL) button on the right, and press the BOTTOM arrow of the sliders underneath corresponding to the PART you want to record into. In this case, the BASS PART. When we see REC in the Part we want to record into, everything is ready to RECORD.

Image

In my next post I'll deal with the VOICE you want to use to do the recording, how to get the recording going, how to keep to the beat, and how to END your recording. This last one is easy! You don't end it! STYLE PARTS are in 'loops', so what you have recorded will 'loop' round and round .. so you can hear how it has turned out. (There is no 'end' to a loop.)

Note: If you want to experiment with doing any of the above, just go ahead. You can abort the process at any time just by pressing the EXIT.

Image

You will be told you will lose it if you don't SAVE it. Well, fine. Confirm that you want to EXIT.
It's all about the music ♫ ♪ ♫ Organ: Yamaha AR80 & Keyboard: Tyros 4
Image .. Image
Challenge Winner
2021 May (Joint Winner); July; September
2022 July; August
2023 April; June; September
User avatar
Hugh-AR
Prolific Poster
 
Posts: 7361
Joined: 07 Feb 2015 15:34
Location: Weston-super-Mare, Somerset, UK

Re: Using STYLE CREATOR to 'adjust' a STYLE

Postby Hugh-AR » 02 Mar 2021 01:16

Having DELETED the existing BASS PART I now need to program in a new bass part. First, I will check out what instrument is being used, which I can do by pressing the TOP arrow above the slider underneath the BASS part. The instrument playing is Acoustic Bass.

Image

I have listened to all the other BASS Voices and I prefer MiniSub, which is on Page 4. It plays a longer note, and is a bit deeper and clearer, so I have selected this.

Image

When I record the BASS Part it will do it with this new Voice I have chosen.

Press the EXIT to get back to the recording screen.

Recording the new BASS PART

Checking at the top of the screen, Slowfox is showing; and underneath in BASIC it says SECTION:MAIN C. Correct. The PATTERN LENGTH (Measure) is 4. This means 4 bars before the 'pattern' repeats itself. The TEMPO is 120, which is fine for playing a Bass Part. Ready for the off?

Press the METRONOME so you are aware of the 'beat'. I have the BELL set up too, so this sounds on the first beat of every bar.

Image

Now press the SYNC START, which will start flashing, 'ready' for you to start playing and recording on the first beat of the bar. The START/STOP next to it will also be ON (but not flashing). This is the button you press to STOP the recording, but Note: You don't STOP the recording until you have listened to the 'pattern' repeating itself and listened for a couple of measures to make sure it sounds OK.

Image

Got yourself 'into the groove' with that beat from the Metronome? You will hear the BELL sounding on the first beat of the bar. Just let it do this a few times while you get yourself composed. You start playing on the first beat of the bar, when the BELL sounds. So what notes to play? Everything you program into STYLE CREATOR must be in the key of C. I said I wanted a sort of 'walking' bass, so starting with C3 I play ...

C E G E, C E G E, C E G E, C E G E, on every beat of the bar.

Note that I have played 16 notes, which is the 'Measure', and have just held that last E a fraction until I hear the Bass Pattern 'repeat' itself. While you are doing this you will hear all the other 'backing parts' playing along with you. Don't let that put you off. In fact, it should help you 'keep to the beat'.

After listening to the repeating pattern you press the START/STOP (whenever) to stop it playing. Happy with how it sounds?

It should sound like this:

Do a rigt-click to open this up in a New Tab.
DEMO of recorded BASS PART

If you are not happy with what you hear, as you are in the recording screen, you can PRESS and HOLD the DELETE button on the right and press the TOP arrow under the BASS PART, which will delete it .. and then you can start again.

If you are happy with it, you need to SAVE it .. but there isn't a SAVE option on this screen! Just move across one Tab to the right, to ASSEMBLY .. and then go back again to BASIC. This time you will see a SAVE so you can SAVE it. Remember that this is a STYLE you have created, so give your adjusted Style a NAME and it will appear with the STYLES in USER.

In case you were wondering, everything you do in STYLE CREATOR is doing it to a COPY of the STYLE. Your original STYLE that you got when you bought your keyboard is in the PRESET section, and will remain 'as was' and cannot be changed or tampered with. This is why we have the USER Tab. What is in here are COPIES of the original.

In my next post I will load this 'adjusted' STYLE back into STYLE CREATOR and program in my 'repeating piano'.
It's all about the music ♫ ♪ ♫ Organ: Yamaha AR80 & Keyboard: Tyros 4
Image .. Image
Challenge Winner
2021 May (Joint Winner); July; September
2022 July; August
2023 April; June; September
User avatar
Hugh-AR
Prolific Poster
 
Posts: 7361
Joined: 07 Feb 2015 15:34
Location: Weston-super-Mare, Somerset, UK


Return to How to do things with the Tyros 4 & 5 Keyboards

Who is online

Users browsing this forum: No registered users and 1 guest